

Basic Breath Control Programming For Kontakt
(View the companion video for this tutorial here)
In this tutorial we’re going to delve into a subject that I have been asked about on many occasions. Probably my number one all-time requested tutorial has been for Kontakt and breath control. Why? Well, because there just really isn’t all that much information out there on programming sounds for wind synthesis.
I think there are a couple of reasons for this: 1) the market for wind driven synthesis is rather small. While there are thousands upon thousands of keyboardists that utilize programming and synthesis on a daily basis, there are very very few serious wind controller players, and even fewer that are interested in programming their own sounds, so there’s no real financial incentive in the market; 2) no one is really willing to share their knowledge of this “arcane art” freely, without compensation for it; and 3) most people really just have no clue how to do it. Time to change that as best we can…
Why Kontakt?
Kontakt is arguably the most widely distributed and most powerful software sampler available today. There are others – I will also be doing a similar tutorial on Logic’s very powerful sampler, the EXS24 – but none that offer the power, flexibility and market saturation of Kontakt. There are literally millions of users out there, so the knowledgebase is large and the support community is deep and well experienced. And again, the number one most requested tutorial has been for breath control programming of Kontakt.
Please note: For all of this to work correctly, you will need a fully functional and licensed version of Kontakt. Kontakt Player will not work! The following tutorial is based on Kontakt 5, but should function similarly in older full versions.
Also check out my tutorial on breath control programming for Apple’s Logic/Mainstage sampler, the EXS24.
So, Here We Go…
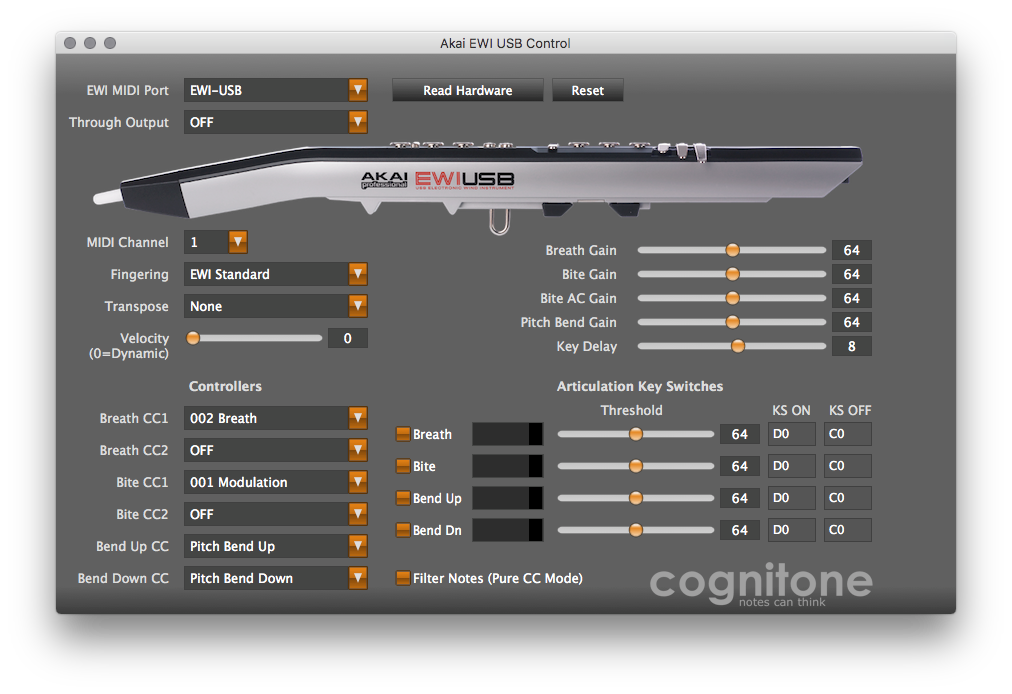
For the purposes of this tutorial, I am using an EWI USB. These methods should work equally well regardless of the EWI you are using, as long as you have BREATH CC#2 turned on in your breath sensor. For now, you should disable all other transmitted CC’s.
Here is a screenshot of my basic EWI USB settings. They’re pretty much stock as you can see:
Download the sample file that we’ll use to build our instrument, here.
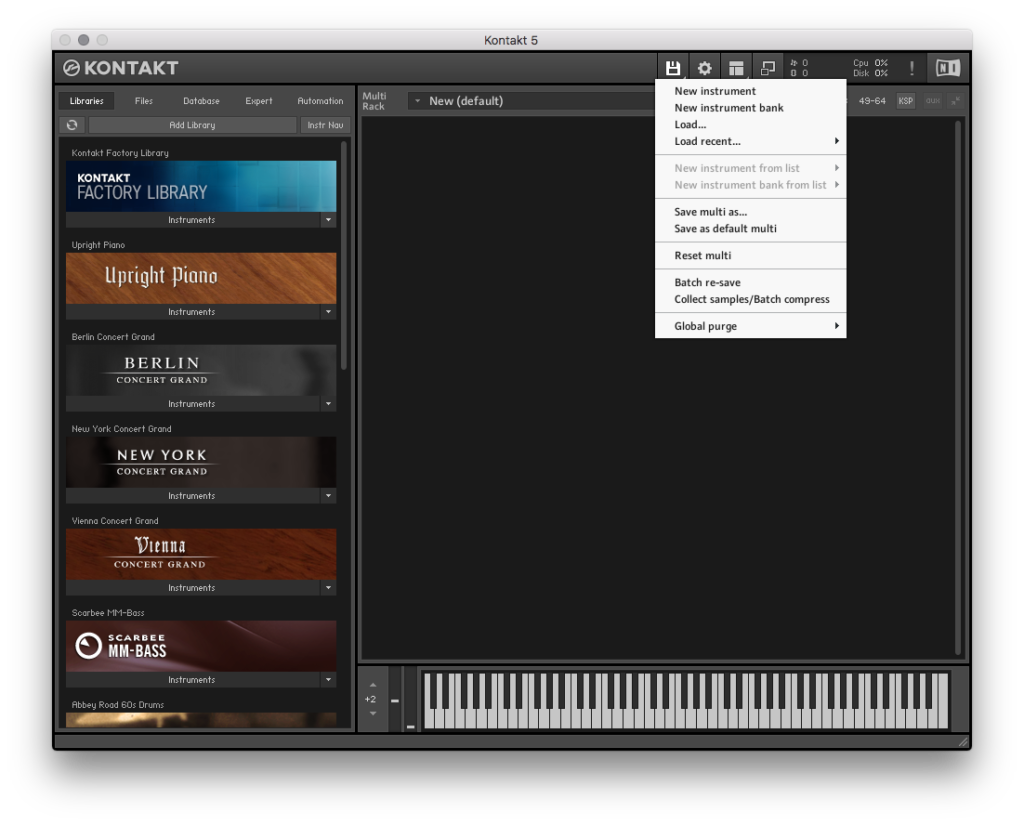
First thing to do is open Kontakt. You should see something similar to this:

Then select NEW INSTRUMENT in the dropdown menu as shown here:
You should then see something like this:

Then open the instrument editor by clicking the wrench icon in the upper left corner of the instrument:

Then in the window that opens, click on the MAPPING EDITOR to bring up this view:

Now, take our EWI SAW SYNTH SAMPLE and drop it into the grid shown in the middle of the window:

You want to assign the sample to the ROOT NOTE of C3, and make sure the properties are set as shown here:

Once you’ve done this, expand the KEY RANGE to C-2 – G8, the entire range of pitches available in the MIDI specification. For this basic tutorial we’re simply going to stretch the entire sample across the range.

Once you’ve done this, close the MAPPING EDITOR.
Now, if you blow into your EWI you should hear a basic sawtooth wave. You will also note that you don’t really have any control over it other than on and off. No real volume control other than velocity for the initial attack. Velocity works great for keyboards and percussion instruments. Sound generation volume for those instruments is completely generated by velocity. Doesn’t work so great for wind instruments as we use breath to control the timbre, intensity and loudness (perceived) of a sound. So how do we create those here?
Now that you’ve accomplished this, open the MOD assignments under the Amplifier section:

Now you will delete the default ADSR MOD by right clicking on it and selecting DELETE from the popup menu that appears:

Also, delete the MODULATOR that was automatically created for VELOCITY.
A Quick Lesson In Envelopes
We’re doing this because we want to create our own envelope to define the attack characteristics of our sound and as stated earlier, we also want the attack amplitude defined by breath, NOT by velocity. First we need to understand how synthesizers (and yes, samplers) interpret the control of sound, specifically the attack and the duration of a sound, and then what happens after that initial attack, e.g., how does the sound evolve? Synthesizers and samplers use in general terms an ADSR ENVELOPE to map how sounds behave over time.
A – Attack
D – Decay
S – Sustain
R – Release
While there are variations on this in the synthesizer world, they all function in fundamentally the same ways.
Attack time is the time taken for initial run-up of level from nil to peak, beginning when the key is first pressed (or breath pressure rises above zero)
Decay time is the time taken for the subsequent run down from the attack level to the designated sustain level.
Sustain level is the level during the main sequence of the sound’s duration, until the key is released. (or breath pressure returns to zero)
Release time is the time taken for the level to decay from the sustain level to zero after the key is released. (or breath pressure ceases)

This is an Amplitude Envelope. The Amplitude envelope of a note is the change in amplitude (while the frequency remains constant) over time and is composed of the attack, decay, sustain and release times. The ADSR envelope is determined by the characteristics of the device that is generating the note. So a piano will have a very different ADSR from a saxophone etc.. The ADSR (Amplitude) envelope together with the harmonics and the overtones give every instrument is unique timbre or sound. Here’s another example of an ADSR represented as a waveform:

We’re going to add an ADSR ENVELOPE to our AMPLIFIER section in Kontakt and use it to shape the response of the instrument.
Now, select ADD MODULATOR under the AMPLIFIER section:

Select ENVELOPES>FLEXIBLE ENVELOPE. Kontakt will now create a default envelope in the Modulation section at the bottom of your edit window. It should look something like this:

What you now want to do is to drag all of the envelope edit points:

Until your envelope shape looks something like this:
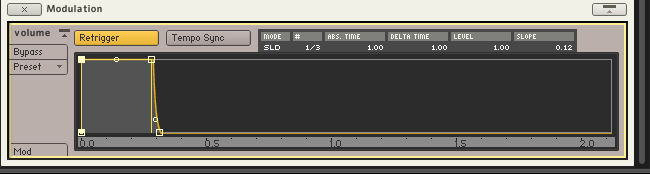
Notice that there is a quick attack, no decrease in amplitude from attack to the sustain stage, i.e., no decay, and there is almost no release time. Try changing these different settings and playing your EWI to get a feel for what the envelope does for and to the sound. You can effect very subtle changes in the evolution of sounds with the use of envelopes.
While it should have defaulted to this when it was created, make sure your new ENVELOPE under the AMPLIFIER section is set to control VOLUME:

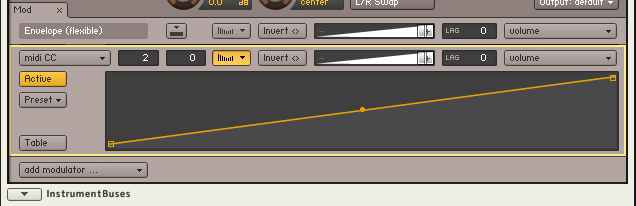
Now, go back to the AMPLIFIER section and add another MOD source. This time selecting EXTERNAL SOURCES>MIDI CC:
 Set the CC value to 2 (Breath) and the default value to 0, then click on the MODULATION SHAPES button to open the SHAPER TABLE:

In the SHAPER TABLE select PRESET>FACTORY>DEFAULT and you should get this:
Now blow into the EWI and notice how your breath intensity changes the volume of the sound. Then reshape the SHAPER TABLE by grabbing the break points to look more like this:
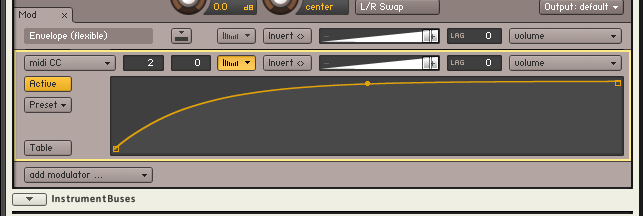
Take note of how the sound now responds differently to your breath. Play with this curve and experiment until you find what works best for your style and your EWI’s settings. There really is no right or wrong, just your personal taste.
No Filter, No Love
We’re now going to add some basic filtering, i.e., EQ to the mix to make our sound more expressive and more interesting. Above the AMPLIFIER section, you should see the GROUP INSERT EFFECTS. In the first slot, click and select FILTERS>LOW PASS>LEGACY LP1:

We’re adding a LOW PASS FILTER which, as its name implies, will allow low frequencies (below the selected cutoff frequency) to pass through while blocking any frequencies above that threshold. You can see the frequency dropoff curve in the waveform display to the right of the cutoff frequency. Select it and set its CUTOFF FREQUENCY to 80hz:

Now, frequencies above 80Hz will be filtered out of the sound. Now blow into the EWI. You should notice that the sound has become very dark and muffled sounding. We’re going to use our breath control to change that so that as we blow harder, the sound will get brighter, just as a real acoustic instrument behaves. Right under LP1, click the MOD button to open up the MOD section for the GROUP INSERTFX. Add a modulator using EXTERNAL SOURCES>MIDI CC. Set its value to 2 (Breath), its default value to 0, and make sure the intensity slider is all the way to 100% and the target is set to CUTOFF FREQUENCY.
Now blow into your EWI. As you blow harder, you should hear the pitch get brighter (and also, apparently louder – hello psychoacoustics!). You will also see this in real time in the GROUP INSERTFX window as the CUTOFF FREQUENCY knob will register the changes in real time. (Notice the little orange dot moving around the outer ring of the CUTOFF FREQUENCY knob. While the numbers don’t change, the dot does move, and you can hear the frequency is being controlled by your breath)
Also, play with the default setting for the CUTOFF FREQUENCY. There are literally thousands of stating points for this and filtering (EQ) plays a huge role in shaping sounds for synthesis. Since the EWI is so hugely expressive with its breath control, leveraging that to control EQ’s and shape sounds with it is one of its strongest assets. You can add any number of EQ’s, filters and other effects and control them via breath, modulation, or any other CC# that you can assign.
If you listen closely to the sound you have created, you will notice that when playing rapidly, there is a noticeable low frequency “thump” or hump in the sound that makes each note’s attack jump out in an unpleasant manner. Let’s fix that, shall we? (While this could also be addressed using a legato script in the SCRIPT EDITOR, that is beyond the purview of this tutorial and will be addressed in a later, more advanced programming tutorial)
Go to the INSERT EFFECTS section and click on one of the blank inserts and select EQ>1 BAND EQ:

Set the FREQUENCY to 120hz, the BANDWIDTH to 1.0 and the GAIN to -6.0. When you play now you should now hear much less of that low end “bump” on the attacks of every note. Play with the frequency, bandwidth and gain settings to get a feel for what they’re doing to the sound. Also take note that you could do this in the GROUP INSERTFX section and attach modulators to it to change the response as you go up in pitch (EXTERNAL SOURCES>KEY POSITION), or as your breath intensity gets harder (EXTERNAL SOURCES>MIDI CC>CC#2), etc. There really is no limit to the number of ways you can use MODULATORS to effect the sound. This might be where using another breath controller CC, i.e., modulation (#1) or expression (#11) could come in handy. Play with assigning different controllers to different destinations and see what happens. Don’t forget the INTENSITY SLIDERS as well as the SHAPER TABLES and all the cool things you can do with those to define and refine the responsiveness of each assignment.
And there ya have it! At this point you should have a very basic, yet usable sound. Used as a starting point, with some experimentation and the addition of some effects (reverbs, delays, etc) there is no reason this sound can’t evolve to become a very useful core sound in your toolbox. Most importantly, with some patience and time spent tweaking a variation on this can become YOUR sound, differentiated from most of the other stuff out there by your taste and your ears and can go a long way towards the beginning of a unique sonic identity on the EWI. Have fun!
Feel free to comment and ask questions below. I’ll be glad to answer as many as I can. Happy EWI’ing!