

Basic Breath Control Programming For Apple’s EXS24 Sampler
(View the companion video for this tutorial here)
In this tutorial we’re going to delve into a subject that I have been asked about on many occasions: Programming breath control for sampled instruments using Apple’s Logic/Mainstage sampler, EXS24.
Why EXS24?
The EXS24 is a very powerful and easy to use sampler, included with the basic install of Logic or Mainstage. The EXS24 also plays very nicely with breath control and other continuous controllers, and it’s also quite easy to route and assign controllers in the user interface using the modulation matrix. While there are other samplers out there, the EXS24 is powerful in its own right and is easy to use and program. Any serious user of Logic/Mainstage with the EWI should know how to program it or at least tweak stock samples to respond in a more friendly manner to breath control.
Check out my tutorial for Native Instruments Kontakt for other ideas.
So, Here We Go…
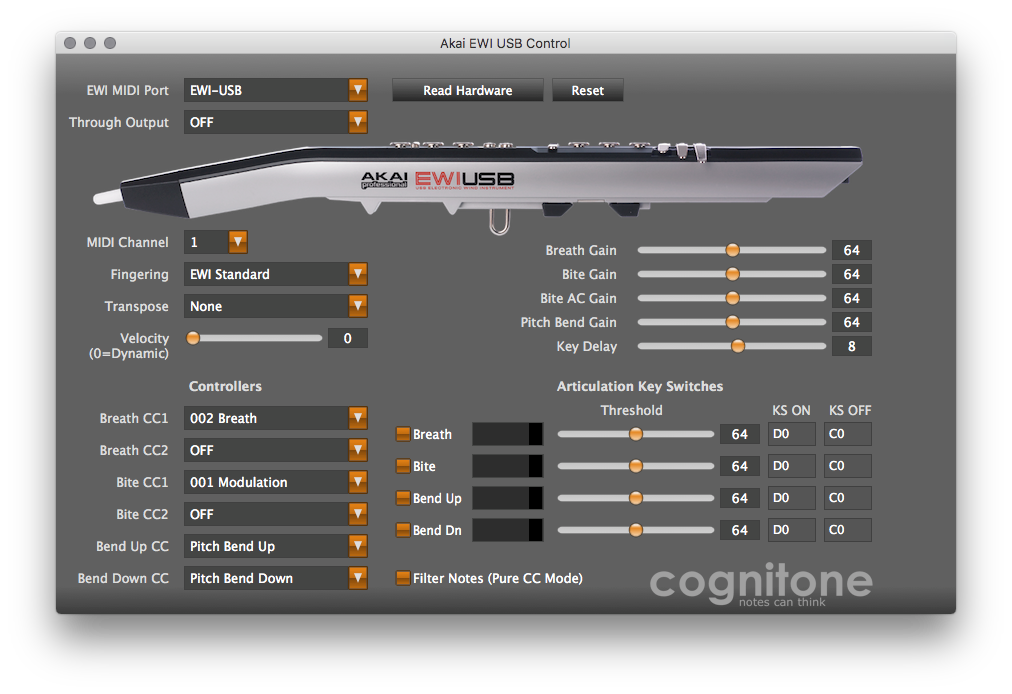
For the purposes of this tutorial, I am using an EWI USB. This should work equally well regardless of the EWI you are using, as long as you have BREATH CC#2 turned on in your breath sensor. For now, you should disable all other transmitted CC’s.
Here is a screenshot of my basic EWI USB settings. They’re pretty much stock as you can see:
Download the sample file that we’ll use to build our instrument, here.
First thing to do is open Logic and instantiate the EXS24. You should see something similar to this:

Next, we want to engage LEGATO and UNISON MODES:

Because unison mode will increase the volume output substantially, we want to turn the master output volume down by roughly 10-12dB:

Next, we’re going to open the INSTRUMENT EDITOR by clicking the EDIT button in the upper right, just beside the instrument display:
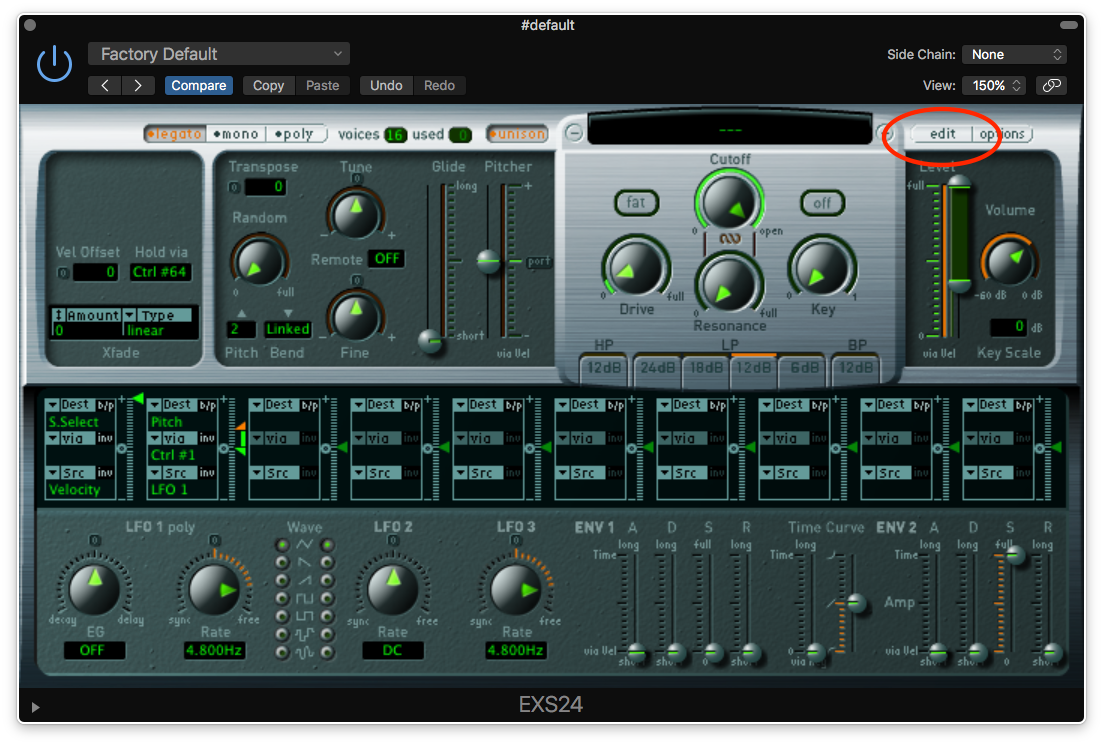
You will then wind up in the instrument editor:

Drag and drop the EWI SAW SYNTH SAMPLE file you downloaded into this window. It should automatically assign the sample to the root note C3, and spread the sample across the entire MIDI range of C-2 – G8:

Once you close this window, it will ask you if you want to save the instrument:

Choose SAVE and choose a name and location for your patch.
Now if you blow into your EWI, you should hear a basic sawtooth wave sound, without much in the way of control or expression. Not very inspiring or fun… yet.
Next Steps…
In the amplifier section, drag the LEVEL slider all the way to the top, to its maximum range, From this:
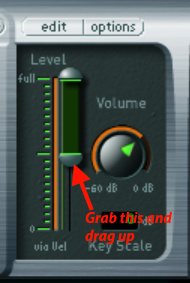
To this:
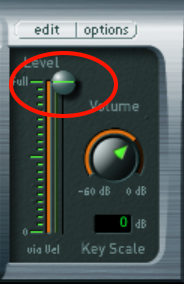
Since we’re not using velocity to define volume, we want the level to always have the potential to be at full volume. Setting LEVEL to full volume accomplishes this.
Volume Shaping
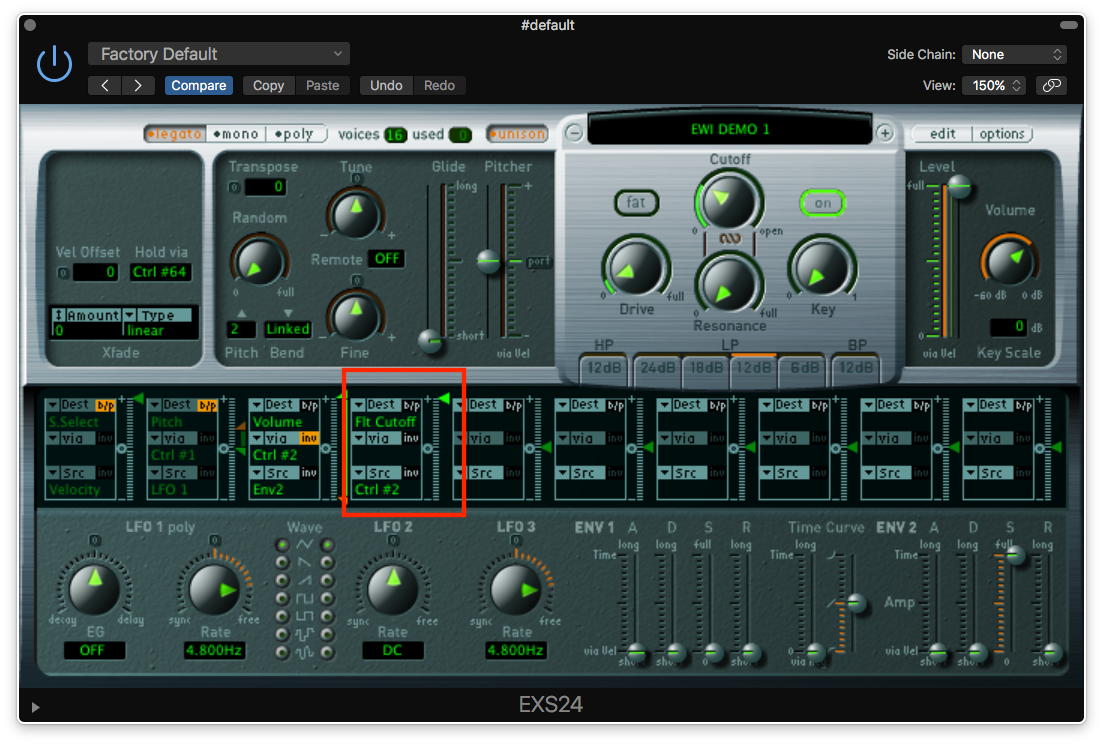
Now let’s get some breath control over volume. Go to the MODULATION MATRIX:

For the purposes of this tutorial, you can either eliminate or bypass the controls that are automatically created. Since we’re only using one sample, there is no need for sample select. The LFO pitch control can be used to dial in subtle to drastic pitch deviations using CC# control (in this case CC1). That’s a subject for a later tutorial…
Bypass them for now by hitting the b/p button in the upper right corner of each assignment slot:

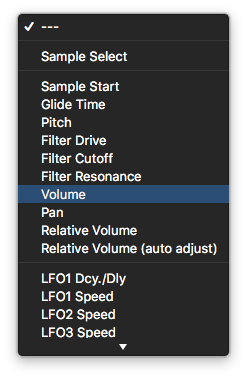
Now we’re going to add breath control to the Amplifier by creating the following settings in the matrix. Click on the DESTINATION menu:

Select VOLUME:
Repeat this process with the SOURCE menu. Set that to ENV2(AMP).
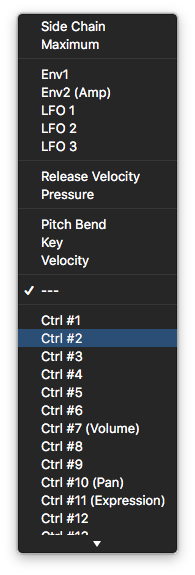
Set the VIA menu to CTR#2 which is breath (continuous controller #2).
Hit the INV button to invert the response, and drag the green and orange arrows to their furthest positions:

Now if you blow into the EWI, you should begin to have some real sense of dynamic control over the sound. Still not perfect but much much better, and beginning to show signs of expressivity.
A Quick Lesson In Envelopes
We’re doing this because we want to create our own envelope to define the attack characteristics of our sound and as stated earlier, we also want the attack amplitude defined by breath, NOT by velocity. First we need to understand how synthesizers (and yes, samplers) interpret the control of sound, specifically the attack and the duration of a sound, and then what happens after that initial attack, e.g., how does the sound evolve? Synthesizers and samplers use in general terms an ADSR ENVELOPE to map how sounds behave over time.
A – Attack
D – Decay
S – Sustain
R – Release
While there are variations on this in the synthesizer world, they all function in fundamentally the same ways.
Attack time is the time taken for initial run-up of level from nil to peak, beginning when the key is first pressed (or breath pressure rises above zero)
Decay time is the time taken for the subsequent run down from the attack level to the designated sustain level.
Sustain level is the level during the main sequence of the sound’s duration, until the key is released. (or breath pressure returns to zero)
Release time is the time taken for the level to decay from the sustain level to zero after the key is released. (or breath pressure ceases)

This is an Amplitude Envelope. The Amplitude envelope of a note is the change in amplitude (while the frequency remains constant) over time and is composed of the attack, decay, sustain and release times. The ADSR envelope is determined by the characteristics of the device that is generating the note. So a piano will have a very different ADSR from a saxophone etc.. The ADSR (Amplitude) envelope together with the harmonics and the overtones give every instrument is unique timbre or sound. Here’s another example of an ADSR represented as a waveform:

The ADSR section of the EXS24 effects the envelope in this manner. If you play with different settings for the different parameters, you will get a number of different response types for the initial attack of the sound, as well as characteristics of the sound after the attack and while sustaining. I encourage you to play with them and see what you can discover.
Onward…
The sound is more expressive but is still not terribly interesting or nuanced. Let’s change that a bit by adding a filter into the mix. Filters are, in their most basic form, EQ’s that are used to shape the sound. In the EXS24’s FILTER section, we’re going to add a LOW PASS FILTER which, as its name implies, will allow low frequencies (below the selected cutoff frequency) to pass through while blocking any frequencies above that threshold. Set the CUTOFF FREQUENCY to 30%:

If you blow into the EWI now, you should hear a much darker sound, and it should be much less responsive. A serious step in the wrong direction! Never fear, we’ll fix that…
Acoustic instruments, in addition to getting louder, tend to get brighter in timbre as you blow harder. We’re going to emulate that by assigning breath to control the CUTOFF FREQUENCY of the filter we just assigned. Create the following assignment in the MODULATION MATRIX:
DESTINATION – FILTER CUTOFF

SRC – CNTRL#2
Drag the intensity slider (little green arrow) all the way to the top, applying 100% effect of breath pressure to cutoff frequency. The modulator should look like this:
The cutoff frequency will never drop below 30%, but using breath, we can cause the frequency cutoff, or threshold point) to rise, thereby passing more of the frequency spectrum through the amp, brightening the sound and also causing an apparent rise in volume as we blow harder (hello, psychoacoustics!). If you blow into the EWI, you should hear the sound grow progressively brighter, and seemingly louder, as you blow harder.
By playing with the intensity slider in the MODULATOR for the CUTOFF FREQUENCY, you can change the amount of effect breath pressure has on the cutoff frequency, thereby changing the response of the filter and therefore the sound. Combining this with the cutoff frequency knob allows for an unlimited number of possibilities for sound design. You should also experiment with the different types of filters, i.e., Low Pass, High Pass, and Band Pass and their different cutoff slopes, i.e., 12dB, 18dB, et. al.
Lastly, transpose the instrument down an octave using the transpose function on the main instrument panel:

And there you have it! A basic, yet fully playable patch using the EXS24. By experimenting with filters and different MODULATION assignments, there are myriad possibilities for this sound to become a powerful part of your EWI’s sonic toolbox.
Most importantly, with some patience and time spent tweaking a variation on this can become YOUR sound, differentiated from most of the other stuff out there by your taste and your ears, and can go a long way towards the beginning of a unique sonic identity on the EWI. Have fun!
Feel free to comment and ask questions below. I’ll be glad to answer as many as I can. Happy EWI’ing!